Continuous Development Pipelines for Covey.Town
In this activity, you will configure a continuous development pipeline using GitHub Actions, Heroku and Render.com. Our pipeline will use GitHub Actions to build and test your Covey.Town fork, and use Render.com to deploy the application.
Pre-requisites
There are two pre-requisites for this activity:
- Everyone in your team must have a GitHub.com account
- At least one member of your team must have the GitHub Student Developer Pack - but we would suggest that you all have it, as in addition to providing Heroku credits, this package also provides free access to GitHub CoPilot. Student report success uploading a PDF of their enrollment snapshot/transcript to get the pack - a student ID doesn’t satisfy GitHub’s requirements (there must be a date).
We have carefully crafted this activity around services that provide free trials. One limitation of note is that Heroku’s free trial appears to be a “once per lifetime” offer - if you have used a Heroku free trial in the past few years (since they switched from “free for everyone” to “only free for students”), you won’t be able to claim another free trial. However, only one member of your team needs to set up Heroku - so we hope that at least one of you will be able to use it. If you run into issues surrounding free trials etc., please reach out to the course staff.
Creating a GitHub Repository
Your team’s development must take place within a private GitHub repository in our GitHub Classroom. To create your repository, each member of your team should follow these instructions:
- Sign in to GitHub.com, and then use our invitation to create a repository with the covey.town codebase. You will need to click the “authorize” button next to
neu-cs4530and go through the NEU single sign on. Then you will see a list of groups. Check to see if one of your groupmates has created a group already - if so, select it to join it. Otherwise, create a team with the exact naming scheme “S24 Group XYY”, where X is your section number and YY is your group number. (Updated 2/28 to suggest prefixing with ‘S24’ to avoid collisions with other semesters’ groups). - Wait for an email to arrive from GitHub, inviting you to join the repository. This email will be sent to the email address that you used to sign up for GitHub. Click the link to join the repository.
- The repository should now be created.
- Clone the repository to your computer. Each of your team members should also follow these steps to join your group and clone the repository to their computer.
This repository will be private, and visible only to your team and the course staff. After the semester ends, you are welcome to make it public - you have complete administrative control of the repository.
If you run into the error “refusing to allow an OAuth App to create or update workflow” when trying to push to GitHub, the fix is to update your saved authentication credentials for GitHub. For instance, you can follow these instructions to update your credentials in the MacOS Keychain. If all else fails, you can connect to GitHub with SSH instead of HTTPS, which will also solve this problem. This error seems to only occur when pushing a change to the GitHub Actions configuration file, so you could also side-step the problem by having a team mate push this change to GitHub instead (who may not run into this issue).
Creating a Twilio account and recording the credentials
You’ll need a Twilio account for your local development environment, and for deployment. You can share a single Twilio account with all of the members in your team (sharing the .env file), but please be careful to avoid posting the contents of your .env file publicly anywhere - someone else might find your credentials and run out all of the free minutes on your account. To set up GitHub Actions and Heroku, we’ll need the values from your .env file - so be sure to get them working before proceeding.
If you have not configured a Twilio account yet, follow these instructions to set one up. If you have done this before but forgot the API key or secret, you can simply follow the instructions to create a new API key.
- Go to Twilio’s website and sign up for an account. You do not need to provide a credit card to create a trial account, but will need to provide a cell phone number. a. When you create your account, to the question to “What do you plan to build…” answer “Other”, to “Which Twilio product are you here to use” answer “Video”, to “How do you want to build with Twilio?” select “With code”, to “Preferred Language” select JavaScript, and to “Would you like Twilio to host your code?” select “No”. (It is OK to select other answers, but selecting these will bring you directly to the “programmable video” part of Twilio’s admin console.
- Create an API Key: Select the “Account” menu from the top toolbar, and then select “API keys & tokens”. If prompted, re-enter your password.
- Click “Create API key”, the big blue button at the top right. Enter any descriptive name that you would like for the “friendly name”, and use the other default settings (US region, “standard” key type). Save the “SID” (this will be referenced later as the
TWILIO_API_KEY_SID) and the “Secret” (this will be referenced later as theTWILIO_API_KEY_SECRET). Once you are sure that you have copy/pasted these for safe keeping, tick the “Got it!…” checkbox and click “Done”. - You should now be back to the “API keys & tokens” page. Take note of the “Live Credentials” in the box lower on this page. The “Account SID” and “Auth token” will be necessary for step 5.
- Create a
.envfile in thetownServicedirectory, setting the values as follows:
| Config Value | Description |
|---|---|
TWILIO_ACCOUNT_SID |
Visible on your twilio account dashboard. Starts with AC… |
TWILIO_API_KEY_SID |
The SID of the new API key you created. Starts with SK… |
TWILIO_API_KEY_SECRET |
The secret for the API key you created. |
TWILIO_API_AUTH_TOKEN |
Visible on your twilio account dashboard. |
You should now be able to start the backend and fronted in your local development environment and have functioning video chat.
Set up Heroku for the backend towns service
We will configure Heroku to automatically deploy the backend townsService to Heroku on every push to the main branch. This way, you can have a publicly available version of your backend service, which will automatically update with any changes that you push to GitHub.
Please note that there are other PaaS providers that you could use for this step (e.g. Vercel, Render.com, Railway) - but we have found that only Heroku’s free product provides sufficient resources to actually run the backend service.
- If you have not already, enroll for the Student Github developer pack and choose “Get student benefits”. Follow the steps as asked after doing this. It generally takes upto 2 business days or more to get the enrollment confirmation from Github.
- Go to Heroku.com and create an account, or sign in if you already have one using the email id same as the one used for Github account.
- Enroll in the Heroku for students offer, if you have not already. This would require you to have already enrolled in the Github student developer pack. You will need to complete 3 steps which involves adding a credit card for receiving the platform credits which then can be used for creating apps.
- After receiving the confirmation of the enrollment in you mail box, the platform credits will be reflected in your billing section in your Heroku account in a few hours. Do not create an app before this.
- After signing in, create a new app. Choose a name for your app that is somewhat descriptive - it will become part of the URL that you’ll use to access the service. Click “Create app” (no need to go through “Add to pipeline…”).
- After creating your app on Heroku, open the app’s settings page, revealing a page that looks like this:

- Click “Reveal Config Vars”, and enter the 4 twilio configuration variables from your
.envfile (the same 4 that you set up on GitHub Actions). Heroku’s “Config Vars” are the way that we tell Heroku what variables to use for.envwithout having to commit that file into the (publicly viewable) repository. Your configuration settings on Heroku should look like this now: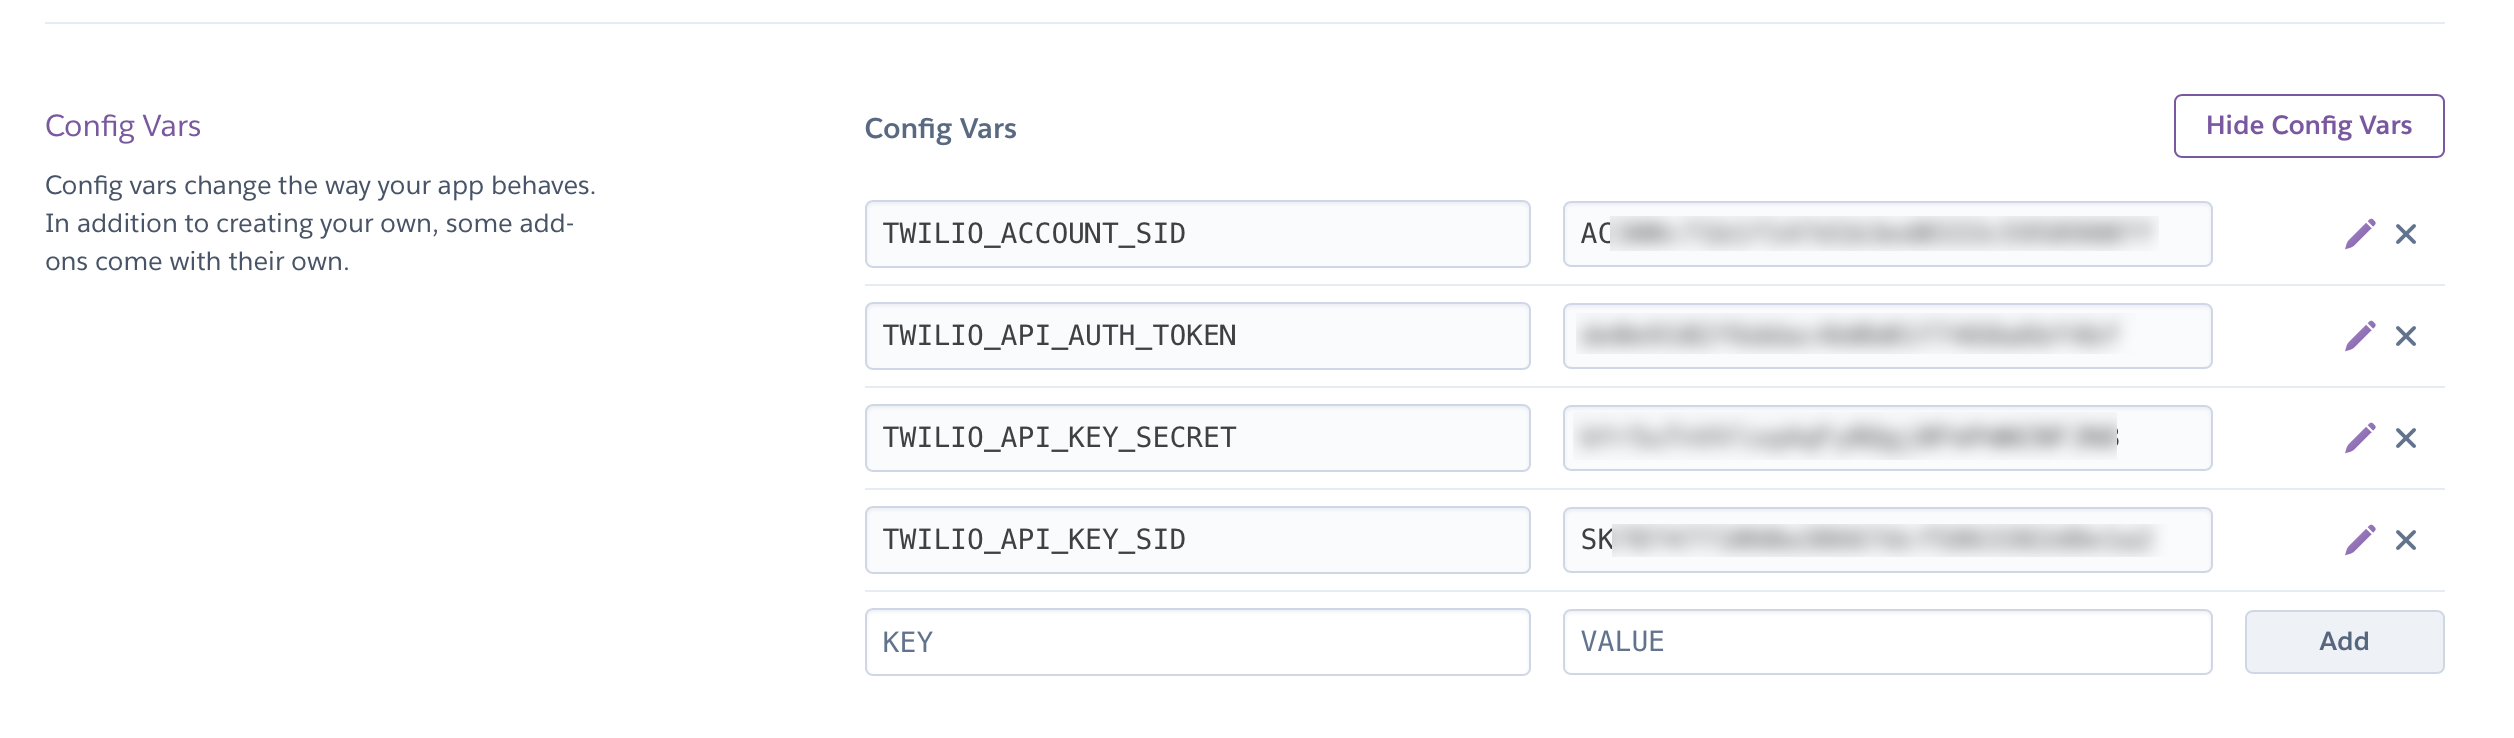
- Before navigating away from this settings page, scroll down to “Domains”, and take note of the address that Heroku has provided for your app. This should say something like “Your app can be found at https://covey-town-sp24-a800bfec4826.herokuapp.com/”.
- Click on the “Deploy” tab (in the same ribbon where “Settings” was), and click on “GitHub” next to “Deployment Method” - sign in if necessary
- Search for your repository in the “Connect to GitHub” section, and click “Connect” next to it. You may need to authorize Heroku to access your GitHub account. Once you have connected your repository, you can click “Enable Automatic Deploys” to have Heroku automatically deploy your app every time you push to GitHub. We suggest ticking the box “Wait for CI to pass before deploy” - this will ensure that your app is only deployed if your tests pass.
- Lastly, scroll down to the button that says “Deploy Branch” and click it. Watch the logs to see if your deployment is successful. If it is not, you may need to troubleshoot the logs to see what went wrong.
- To confirm that your service is successfully deployed (after the build log shows that it completed successfully), try to visit it in your browser. Use the URL that you noted in step 8 (“Your app can be found at https://covey-town-sp24-a800bfec4826.herokuapp.com/”). Append
townsto the URL, and visit it in your browser (e.g.https://covey-town-sp24-a800bfec4826.herokuapp.com/towns). After a short delay, you should see the response[].
Set up Render.com for the frontend application
The last step to our continuous development pipeline will be to automatically deploy our frontend to Render.com. Render.com will create an optimized production build of your frontend (by running npm run build) and host it in their globally-distributed content delivery network.
- Go to Render.com and create an account that is linked to the same GitHub account that you used to create your fork of the starter code.
- After signing in, create a new app by clicking the “new” button. Select “Static Site” as the type of the app.
- Connect Render.com to your GitHub account, and give it permission to access your repositories.
- Use the “Connect a repository” picker to select your fork of the starter code. Click next.
- Configure the site:
- Choose a name for your app - this will become part of the URL that you’ll use to access the application. You can use the default, or change it
- Leave branch at
main, and root directory blank - For build command, enter
npm install && cd frontend && npm install && npm run prestart && npm run build && npm run export - For publish directory, enter
frontend/out - In “Environment Variables” add a variable with the key
NEXT_PUBLIC_TOWNS_SERVICE_URL, setting the value to be the URL of your townService (e.g.https://covey-town-sp24-a800bfec4826.herokuapp.com) - Click “Create static site” to create the site.
- Render.com will take several minutes to build your site. Once it is deployed, visit the site and confirm that it’s working. If you see an error in the JavaScript log like
process is not defined, this indicates that the site was not built with theNEXT_PUBLIC_TOWNS_SERVICE_URLvariable set - confirm that it is correctly set, and then rebuild the site on Render.com.