Individual Project 1 Due Wednesday January 21, 2026 11:00am (EST)
The individual and group projects for this course place you in the role of the most recent hire at GameNite, an interactive application for people who like playing, or commenting on, multiplayer strategy games. It recently received a large investment thanks to its elevator pitch, “what if we had a version of Twitch, but for correspondence chess?”
GameNite is a web application that consists of some code that runs in each client’s web browser, and also code that runs on a server. By the end of the semester, you’ll propose, design, implement, and test new features for our project. We understand that some of you may have some web development experience, but don’t expect that most of you do, the goal of this first project is to get you up to speed with our existing codebase and development environment.
The objectives of this assignment are to:
- Get you familiar with the basics of TypeScript, VSCode, and the project codebase
- Get familiar with how REST API requests work
- Learn how to read and write code in TypeScript
- Learn how to write unit tests with Vitest
- Translate high-level requirements into code
Changelog
- 2026-01-07: Clarified that all changes should be made to the
mainbranch. - 2026-01-09: Clarification in Task 3, part 2: instead of “modify the tests,” say “improve existing tests and/or add new tests.”
- 2026-01-10: Correction:
AuthRecordis defined inserver/src/models.ts, not inserver/src/models/auth.model.ts. - 2026-01-11: Changed application tab to “Network” tab (the precise name may depend on the browser) in the Recommendations section.
- 2026-01-13: Added “and” to the sentence “ESLint warnings do not cause CI to fail and will not automatically lead to a deduction”
- 2026-01-13: Corrected
UserRecordtoAuthRecordin the sentence “Additionally, when you create a user, you’ll add an entry tostoredAuthsthat maps the username to theAuthRecord.” - 2026-01-14: Corrected
getUserByUser()togetUserByUsername()in Part 5. - 2026-01-14: Replaced submission instructions from .txt file to pdf file.
- 2026-01-18: Mentioned reference implementation, clarified that playerIndex=0 is “Player #1” on the frontend, removed mention of mutant-tester.
1. Getting Started
If you were registered for the class before Wednesday, January 7, you should have an email from a TA with an invitation to our organization. Be sure to check your spam/junk folder. The first step is to accept the invitation. If you cannot find the invitation, if you registered for the class late, or have any other issue that keeps you from getting started, please create a Piazza post to contact us and we will try to help.
After that, accept our GitHub Classroom Invitation for this assignment. It will create a Github repository for you which will include the starter code for this assignment.
If you are new to Git, you may want to work on “Learning Basics of Git” assignment first! We expect all students to be able to use add/commit/push for their work.
1.1. Prerequisites
You’ll need to start by setting up your development environment, including node.js and npm.
Next, make sure you have used Git to clone the starter code. This code is divided into 3 main directories: client, server, and shared. These are connected in a single NPM workspace, but you shouldn’t have to worry much about what that means.
After that, follow the following steps:
-
Navigate to the root directory of the repo.
-
Install the dependencies:
ip1-me $> npm install -
Start the server:
ip1-me $> cd server
server $> npm run dev
You should then be able to visit http://localhost:8000 and get a message that tells you that you should be looking at elsewhere for the Vite frontend.
-
Leave
npm run devrunning in the./serverdirectory for the next step. -
Open a new terminal window and start Vite, and start the Vite development server using the following commands:
ip1-me $> cd client
client $> npm run dev
This will give you a url to go to, probably http://localhost:4530/. If you see a login page, then you’re up and running. You can create a new user or use one of the four automatically-created username-password combinations:
user0/pwd0000,user1/pwd1111,user2/pwd2222, oruser3/pwd3333.
1.2. Understanding “The Server”
The code in the server directory is all TypeScript that is intended to be run on a web server. It’s built on top of express, a library used to create programs that accept and respond to HTTP requests. Express can do a lot of things, but we’re only using it to send and receive chunks of JSON-formatted data (line 19 of server/src/app.ts tells the Express library to behave that way).
HTTP GET Requests
Your web browser makes one kind of HTTP request, a GET request, whenever you type in a URL and hit ENTER. If you go to http://localhost:8000/api/thread/list while the server is running, you will see a bunch of JSON-formatted data. Line 37 of server/src/app.ts causes the request to that URL to be sent to the getList controller, which is just a function that is defined in server/src/controllers/thread.controller.ts.
HTTP GET requests are supposed to just look up information. It is considered bad behavior if a HTTP GET requests changes anything about the state of the world. (Creating a new account on a website, updating a password, sending a chat message, and or deleting a Google doc are all examples of changes to the state of the world; HTTP GET shouldn’t be able to trigger any of these changes.) In the context of GameNite, a HTTP GET request shouldn’t add a new comment, or create a new post, or initialize a new game.
HTTP POST Requests
A HTTP POST request, on the other hand, sends information to a server and receives information in return; it may change things about the state of the world. You can make POST requests with a tool like Postman or from the command line with a tool like cURL. If you run this cURL command while the server is running, it will make a new post that you can see if you go to the website’s frontend.
curl --location 'localhost:8000/api/thread/create' \
--header 'Content-Type: application/json' \
--data '{
    "auth": {
        "username": "user3",
        "password": "pwd3333"
    },
    "payload": {
        "title": "New Post",
        "text": "Text goes here"
    }
}'
Line 36 of server/src/app.ts causes this request to be sent to the postCreate controller, which is also just a function defined in server/src/controllers/thread.controller.ts.
You may find that it’s easier to make HTTP POST requests from a tool like Postman instead of writing curl commands directly. If you click the </> icon in Postman while developing a request, you can pick “cURL” from the dropdown menu and get a command-line snippet that performs the same request.
Other HTTP Requests
There is a whole vocabulary of HTTP requests, but the most important two for this class are GET and POST. There’s a whole vocabulary of HTTP requests that you can learn more about.
1.3. Understanding “The Client”
The code in the client directory is mostly TypeScript that is intended to be run in a web browser. But web browsers don’t know how to run TypeScript, they only know how to run JavaScript. While you’re working on a project, it’s important to be able to look at what your code is doing in a web browser, and when you’re done working on your project, all your code needs to be turned into a form that can get shipped to a web browser.
GameNite uses Vite for this. Vite is a build tool — you use to preview the website you’re building, and you use it to build the final website that you ship to users.
1.4. Shared Code
The TypeScript types in the shared directory are used by both the client and the server. The data sent by HTTP POST request to create a post has the TypeScript type WithAuth<CreateThreadMessage>, which, if you look at shared/src/auth.types.ts and shared/src/thread.types.ts, you can see expands to this TypeScript interface:
type TypeOfPostRequest = {
  auth: {
    username: string;
    password: string;
  };
  payload: {
    title: string;
    text: string;
  };
}
The client can use the WithAuth<CreateThreadMessage> type to ensure that it is sending a message with the right structure to the server. Because these types are described with zod schema validators, the server can use the same code to check that it received something with the right structure. (Usually the server gets things sent by the client, but as we saw, you can also use cURL to send random nonsense to the server. The server can’t trust anything about the structure of information it receives from a HTTP request!)
1.5. Testing
Unit tests for the server are in server/tests/**/*.spec.ts. These are written in Vitest, a tool discussed in one of the first two lectures. (If you’ve used Jest, you should be good to go: Vitest is designed to be very similar.)
You can test the server by going to the server directory and running npm run test. It can be very helpful to have tests constantly re-running whenever you edit code, which you can do by running npm run vitest.
2. Recommendations When Working on the Project
- Open the client application in a browser and interact with it. While interacting, monitor the “Network” tab (the precise name may depend on the browser) in your browser’s developer tools. This tab will give you information about the HTTP requests the client sends to the server. The HTTP requests will contain URIs in their headers. You can use this information to understand the endpoints in the server.
- Make sure VS Code is set up as described in the development environment tutorial, with ESLint, Typescript, and Prettier installed. Our ESLint setup encodes very specific style rules, and if you do not have VSCode lint feedback enabled you will have to deal with an avalanche of errors when you first lint your code.
- Do not wait until the last minute to run
npm run lintandnpm run buildto check for linter and typescript errors! - Follow the debugging policy to help in the debugging process.
- Frequently add and commit changes with git. This saves your changes and makes it easy to go back to a state where most tasks were complete.
3. Project Submission
You will submit your code by pushing the final version into your repository (add/commit/push). In this assignment, you should only be making, committing, and pushing changes to the main branch of your repository. Be sure to check if the correct version is submitted before the deadline.
On Gradescope, you will submit a .pdf file containing two things:
- The link to your project’s GitHub repo (e.g.
https://github.com/neu-cs4530/ip1-robsimmons) - The written responses and cURL commands requested in Task 3.
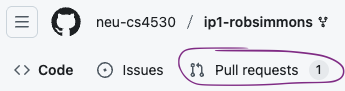
We will grade your code on GitHub by using the “Feedback” PR that is automatically created when the assignment is. The Feedback PR can be found under the “Pull requests” menu, like this:
If you don’t see your Feedback PR for the assignment, let us know on Piazza (be sure include your GitHub username).
Grades will be assigned on Gradescope and synced to the Canvas Gradebook.
TypeScript ESLint, Vitest, and Configuration Files
The GitHub project contains a number of configuration files you may not modify: package.json, package-lock.json, .prettierrc, tsconfig.json, vitest.config.mjs, and vite.config.mjs are configuration files, as is everything in the .github directory. If you change any of these files, take care to change them back; the list of changes in the feedback PR should not show any changes to these files. You also may not include eslint-disable commands to disable ESLint’s checks in your final submission.
The code you submit must pass GitHub’s automatic checks, which mostly just amount to the TypeScript typechecker, the ESLint linter, and the tests. You can run these yourself like this:
ip1-me $> npm run check --workspaces
ip1-me $> npm run lint --workspaces
ip1-me $> npm run test --workspaces
When you push your code to GitHub, you can see the status icon for your most recent submission. It’s initially a yellow circle, like this:

After the tests run, this will turn into a red ❌ or a green ✅. Clicking on the icon will let you see details of the tests we ran.
The Actions tab on GitHub has the results of previous runs.

Up to 25% of your total grade on the assignment may be deducted for CI failures (5% for prettier failures, 10% for TypeScript failures, and 10% for ESLint failures). In severe cases we may decline to grade your assignment entirely. Give yourself sufficient time to find and fix any errors. ESLint warnings do not cause CI to fail and will not automatically lead to a deduction, but it is bad practice to have lots of console statements in your code, and this can lead to a point deduction if it makes it hard for a TA to understand your code.
4. Implementation Tasks
Task 1: Tic-Tac-Toe
You should try to start a game of Tic-Tac-Toe in the development server.
(Log in as two different users in two different windows.) You should observe that other games work, but Tic-Tac-Toe does not! To make Tic-Tac-Toe work on GameNite, you’ll need to fill in the missing implementation in server/src/games/ticTacToe.ts.
Places to look for guidance:
- The type specification for a game implementation in
server/src/games/gameLogic.ts, explains what each unimplemented function does. - The types of Tic-Tac-Toe in
shared/src/games/ticTacToe.ts, explain in detail how the game is intended to work. - The implementations of Nim and Guessing Game in the directory
server/src/games, which may be a helpful basis for comparison.
[Update 2026-01-19] A reference implementation is available at https://gamenite.onrender.com/, you’ll need to create an account (or two) to use this reference implementation. Note that shared/src/games/ticTacToe.ts refers to the players by their playerIndex: the user that initiates the game is given index 0, and the second player has index 1. The frontend refers to these as “Player #1” and “Player #2”, respectively.
This task is worth 25 points:
- 15 points will be assigned automatically based on passing our test suite
- 10 points will be assigned by TAs manually checking for issues with code style. Take care to document any helper functions you include.
Task 2: Tests for Tic-Tac-Toe
The purpose of this part of the assignment is to get used to writing Vitest tests. (Copilot-esque LLM autocompletion is quite good at writing tests, and you’ll have a chance to try this out later in the class. If you have Copilot-style autocompletion enabled, you are violating the course’s academic integrity policy and risking a failing grade, and in addition, this task will be exceptionally pointless and boring.)
Write tests for Tic-Tac-Toe in a new file, server/tests/games/ticTacToe.spec.ts. Your tests should achieve full branch coverage on your own implementation of Tic Tac Toe: when you run npm run test in the server directory, Vitest should report no “Uncovered Line #s” in src/games/ticTacToe.ts. (You can also open the index.html file in the coverage folder that vitest creates when you run npm run test, which provides an easily readable coverage report.) There are other parts of the application that don’t have full coverage, but you only need to worry about coverage of the ticTacToe.ts implementation.
Make sure to look at the tests for Nim and Guessing Game, they will provide an excellent guide.
This task is worth 20 points:
- 5 points for having tests that reasonably test each of the main functions you have implemented
- 5 points for following the format and style of the Nim and Guessing Game tests
- 6 points for achieving full branch coverage for
ticTacToe.ts(3 points for 90%+ branch coverage) - 4 points for your tests working against some of our custom “mutants” — your tests should not be overspecified (they should pass valid implementations of
ticTacToe.tsthat may be slightly different than your own), and they should correctly catch and fail implementations of Tic Tac Toe that have bugs.
Watch out on Piazza — we will try to set up an autograder that optionally lets you test your tests against our mutants Tic Tac Toe implementations closer to the assignment deadline. We’ll also allow you to test your own Tic Tac Toe implementations, and reserve the right to give bonus points to anyone who can show a valid Tic Tac Toe implementation that fails our tests. [Update 2026-01-19] we will not be able to provide this before the deadline.
Task 3: Exposing Errors in the User Service
There are several problems with the User service for GameNite. In the remainder of this assignment, you will begin addressing them.
The first and most glaring is that some of the functions, despite claiming to return SafeUserInfo objects, actually return passwords, which are then passed on to the controller and returned. REST API calls should never expose passwords in their responses like this!
-
Investigate the five User REST API endpoints listed in the README, the User controller in
server/src/controllers/user.controller.ts, and the User service inserver/src/services/user.service.ts, to find at least one way of exposing passwords through the API. In the written part of your submission, include a cURL command that result in the User API returning passwords. -
It’s quite embarrassing that these bugs exist despite the user service having 100% test coverage! Here’s your chance to do test-driven development. First, improve existing tests and/or add new tests so that the test suite actually fails (as it should!) on the current implementation. The User record’s
userId(a random id, not the username) and thepasswordshould never be exposed through REST API endpoints, and the tests should account for this requirement. Second, modify the user service so that it passes the new tests. -
In the written part of your submission, briefly explain why TypeScript allowed a SafeUserInfo-returning service function to include a password field despite SafeUserInfo having no password field.
-
Challenge: there’s another definite bug in the user service that’s a little more difficult to find, but that could potentially represent a security issue. Identify the bug and include a cURL command that demonstrates it, explain why the cURL command demonstrates something bad happening, create a failing test, and fix the bug. (This is just worth 5% of the overall score for this assignment. Don’t get stuck here and neglect the other tasks!)
This task is worth 20 points: 5 points for each sub-part.
Task 4: Creating an Auth model
There are two connected issues with the User model:
- There’s a frequent use of for-loops to loop through all the usernames to find a record that matches a specific username.
- Storing authentication information like a password alongside user profile information like a display name is not a great design: it can make accidental leaks like the ones we’ve encountered more likely!
These aren’t totally connected problems, but we can solve them together. The file server/src/services/user.service.ts contains an unused storedAuths object that you will use to maintain a mapping from valid usernames to the user IDs that let you look up profile information (like the display name) for that user. The AuthRecord type defined in server/src/models.ts also contains a password.
Whenever you create a user, you’ll continue to create a new and random user ID, and add to storedUsers an entry that maps from the user ID to the user’s record. You should modify UserRecord to no longer contain a password, and ensure that the stored record does not contain a password. Additionally, when you create a user, you’ll add an entry to storedAuths that maps the username to the AuthRecord. By using stored auth records, you can find the user record associated with a username in two steps: find the user ID using storedAuths, and then find the user’s record with that ID in storedUsers.
To complete this part, you should:
- Remove the
passwordfield fromUserRecord, and instead - Maintain the property that whenever you have
storedUsers[id] === user, thenstoredAuth[user.username].user === id. - Avoid having any functions in
user.service.tsthat loop over all elements in a JavaScript object in order to find one in particular. - Ensure that all tests still pass and that the tests still provide total branch coverage for the User service (
user.service.ts. You don’t need to worry about coverage of other files.
This task is worth 20 points, which will be assigned by manual grading:
- 5 points for correctly modifying the User and Auth records
- 5 points for correctly updating document comments and documenting new
- 5 points for ensuring that the stored User records and stored Auth records stay in sync
- 5 points for ensuring that there are no functions that loop through all the usernames in order to find one in particular
Task 5: Refactoring the Auth model
The purpose of this part of the assignment is to get your fingers comfortable with the functionality that TypeScript provides, and comfortable with seeing “red squiggly” errors in VSCode and then fixing them. (Again: if you use LLM or Copilot-powered autocompletion on this part, you are doing nothing but interfering with your own learning.)
Suggestion: if you haven’t added and committed your code with Git yet, you should do so now. This task has you making a lot of changes, and it may be helpful to be able to quickly go back to the code before you started making changes.
You now have two different types of code mixed up in user.service.ts — code primarily concerned with authentication, and code primarily concerned with the user’s personal data. In this part, your goal is to move the following elements from user.service.ts to a new file, auth.service.ts:
storedAuths(which should not be exported fromauth.service.ts)resetStoredAuth()getUserByUsername()checkAuth()enforceAuth()
The following should stay in user.service.ts:
disallowedUsernamesandstoredUsers(which should not be exported)populateSafeUserInfo()createUser()getUsersByUsername()updateUser()resetStoredUsers()
You can add additional exported functions from auth.service.ts if needed — you’ll need to create at least one other helper function to create and/or update AuthRecord records, and call those helper functions within user.service.ts.
Moving these functions will break a lot of other parts of the server, but using TypeScript, the linter, and your tests, it should not be too arduous to find what broke and fix it.
This task is worth 15 points:
- 6 points for the all the functions ending up in their correct files as described above
- 5 points for tests passing and for
user.service.tsandauth.service.tsstill having 100% branch coverage (minus 1 point for each missing coverage-percentage, but no negative points, zero points if any tests fail or if TypeScript tests fail because of the refactor). Don’t worry about coverage in any other files. - 4 points for all functions having correct code style and documentation
5. Grading Summary
The assignment as a whole is worth 100 points.
- Task 1: 25 points
- Task 2: 20 points
- Task 3: 20 points
- Task 4: 20 points
- Task 5: 15 points