Activity 10.1 Continuous Development Pipelines
In this activity, you will configure a continuous development pipeline using GitHub Actions, Heroku, and Netlify. Our pipeline will use GitHub Actions to build and test your Covey.Town fork. After successful compilation and testing, the pipeline will deploy the backend service to Heroku, create an optimized production build of the frontend, and deploy that frontend to Netlify.
This activity is split up into three phases: setting up GitHub Actions to build and test your project, then to deploy to Heroku, and lastly, to deploy to Netlify.
Pre-requisites
There are two pre-requisites for this activity: you must have a GitHub.com repository that is up-to-date with our main Covey.Town repository (that is, you must have merged in our recent commits), and you must have a Twilio account. Khoury’s internal GitHub does not support GitHub Actions, and in general, it is extremely difficult to use Khoury’s GitHub in a Continuous Integration Pipeline.
Syncing your project repository with ours
If you have not already created a fork of the Covey.Town repository for your project development, do so now. You will be able to complete this activity using either a public fork of our repository, or a private mirror.
We’ve added a few tweaks to the repo to make it easier to complete this activity (mainly - adding the HW3 tests refactored to match the new ‘towns’ service name, and adding the HW4 solution). To complete this activity, you will need to sync your fork to receive these latest updates. If you haven’t yet set up this syncing, run these commands in a terminal (in your project directory):
$ git remote add upstream https://github.com/neu-se/covey.town
$ git fetch upstream
$ git checkout master
$ git merge upstream/master
You may need to resolve merge conflicts, particularly if you have made changes to TownSettings.tsx or TownSelection.tsx. Resolve these conflicts by editing the files until they are correct, and then run git add on the conflicted files (see this guide for examples + detailed steps).
Important: Our recent changes have included an update to the version of Phaser in the project dependencies. You’ll need to run npm install after merging in these updates to install the update version.
If you run into the error “refusing to allow an OAuth App to create or update workflow” when trying to push your merged changes back to GitHub, the fix is to update your saved authentication credentials for GitHub. For instance, you can follow these instructions to update your credentials in the MacOS Keychain. If all else fails, you can connect to GitHub with SSH instead of HTTPS, which will also solve this problem. This error seems to only occur when pushing a change to the GitHub Actions configuration file, so you could also side-step the problem by having a team mate push this change to GitHub instead (who may not run into this issue).
Creating a Twilio account and recording the credentials
If you have not configured a Twilio account yet, follow the instructions in the Covey.Town README to set one up. You’ll need this for your local development environment. You can share a single Twilio account with all of the members in your team (sharing the .env file), but please be careful to avoid posting the contents of your .env file publicly anywhere - someone else might find your credentials and run out all of the free minutes on your account. To set up GitHub Actions and Heroku, we’ll need the values from your .env file - so be sure to get them working before proceeding.
Set up GitHub Actions
Once your git repository is up-to-date, you can configure GitHub Actions by following these steps:
- Log in to GitHub, and navigate to your project. Go to the “Settings” tab, and then select “Secrets.” Enter each of your Twilio secrets (from your
services/roomService/.envfile) as new variables here, as shown in this screenshot: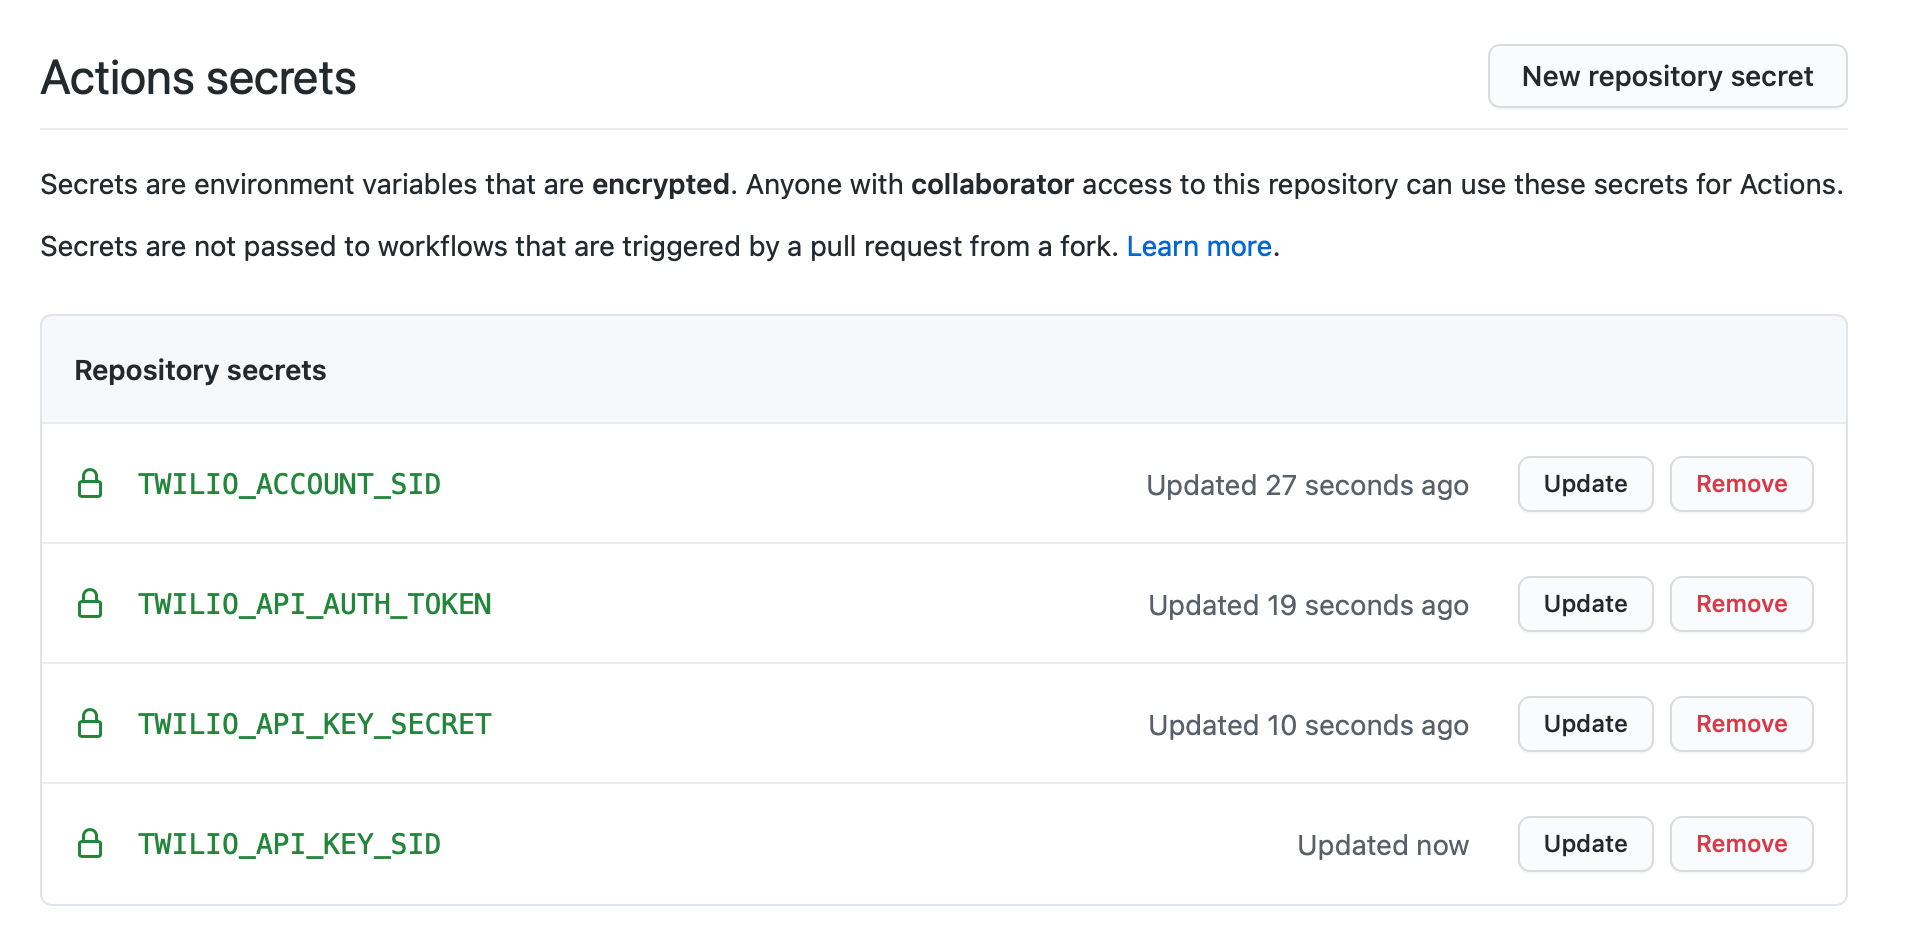
Assuming that you have already merged the most recent version of the covey.town codebase into your own (following the steps above), you should now have a GitHub Actions configuration in your project (hooray!). Navigate to the “Actions” tab in GitHub. You should see that the most recent build has failed. GitHub Actions tried to build your project immediately (when you merged in our changes), and did not have the Twilio secrets needed to run the tests. You can now re-trigger the build (click “Re-run jobs” from the job overview page). While it’s running, let’s take a brief look at the workflow configuration that will run the tests, by looking at the
.github/workflows/main.ymlfile. You won’t need to make any changes here, but should take a quick look to see what’s going on:name: Covey.Town CI on: # Controls when the action will run. # Triggers the workflow on push or pull request events but only for the master branch. If you want to trigger the action on other branches, add here push: branches: [ master ] pull_request: branches: [ master ] # Allows you to run this workflow manually from the Actions tab workflow_dispatch: # A workflow run is made up of one or more jobs that can run sequentially or in parallel jobs: build-and-test: # # The type of runner that the job will run on runs-on: ubuntu-latest # Steps represent a sequence of tasks that will be executed as part of the job steps: - uses: actions/checkout@v2 - name: Build and test backend service env: # Pass the Twilio secrets into environmental variables for the backend tests to use TWILIO_ACCOUNT_SID: ${{ secrets.TWILIO_ACCOUNT_SID }} TWILIO_API_AUTH_TOKEN: ${{ secrets.TWILIO_API_AUTH_TOKEN }} TWILIO_API_KEY_SECRET: ${{ secrets.TWILIO_API_KEY_SECRET }} TWILIO_API_KEY_SID: ${{ secrets.TWILIO_API_KEY_SID }} run: cd services/roomService; npm install && npm test - name: Build and test frontend components run: cd frontend; npm install && npm test- Navigate back to the “Actions” tab. You should still see the the entire build failed (with a red X), but can now drill-down and see that of the two jobs (“build-and-test” and “deploy”), “build-and-test” passed. The deploy job is expected to fail because we haven’t yet configured the deployment! If the “build-and-test” job failed, consider the following troubleshooting tips:
- If the build failed with
No tests found, exiting with code 1, then your repository does not have any tests. Double-check that you have synced your repository with ours, and that the tests are present. GitHub Actions will automatically try to build future commits that you make as you try to fix it. - If the build failed due to undefined Twilio secrets, double check that you have correctly entered the Twilio secrets from your
.envfile into the GitHub Settings -> Secrets for your repository. Make sure that you have put the secrets on the same repository that you are setting up the GitHub Actions for.
- If the build failed with
Set up Heroku
Now that we have GitHub Actions successfully running our tests, we can configure it to also automatically deploy the backend rooms service to Heroku. This way, you can have a publicly available version of your backend service, which will automatically update with any changes that you push to Git. Note that it is possible to set up Heroku to automatically deploy every new change that you push to GitHub (without setting up GitHub Actions). Instead, we’ll configure our GitHub Actions pipeline to deploy to Heroku only if our test suite passes.
- Go to Heroku.com and create an account, or sign in if you already have one
- After signing in, create a new app. Choose a name for your app that is somewhat descriptive - it will become part of the URL that you’ll use to access the service. Click “Create app” (no need to go through “Add to pipeline…”)
- After creating your app on Heroku, open the app’s settings page, revealing a page that looks like this:
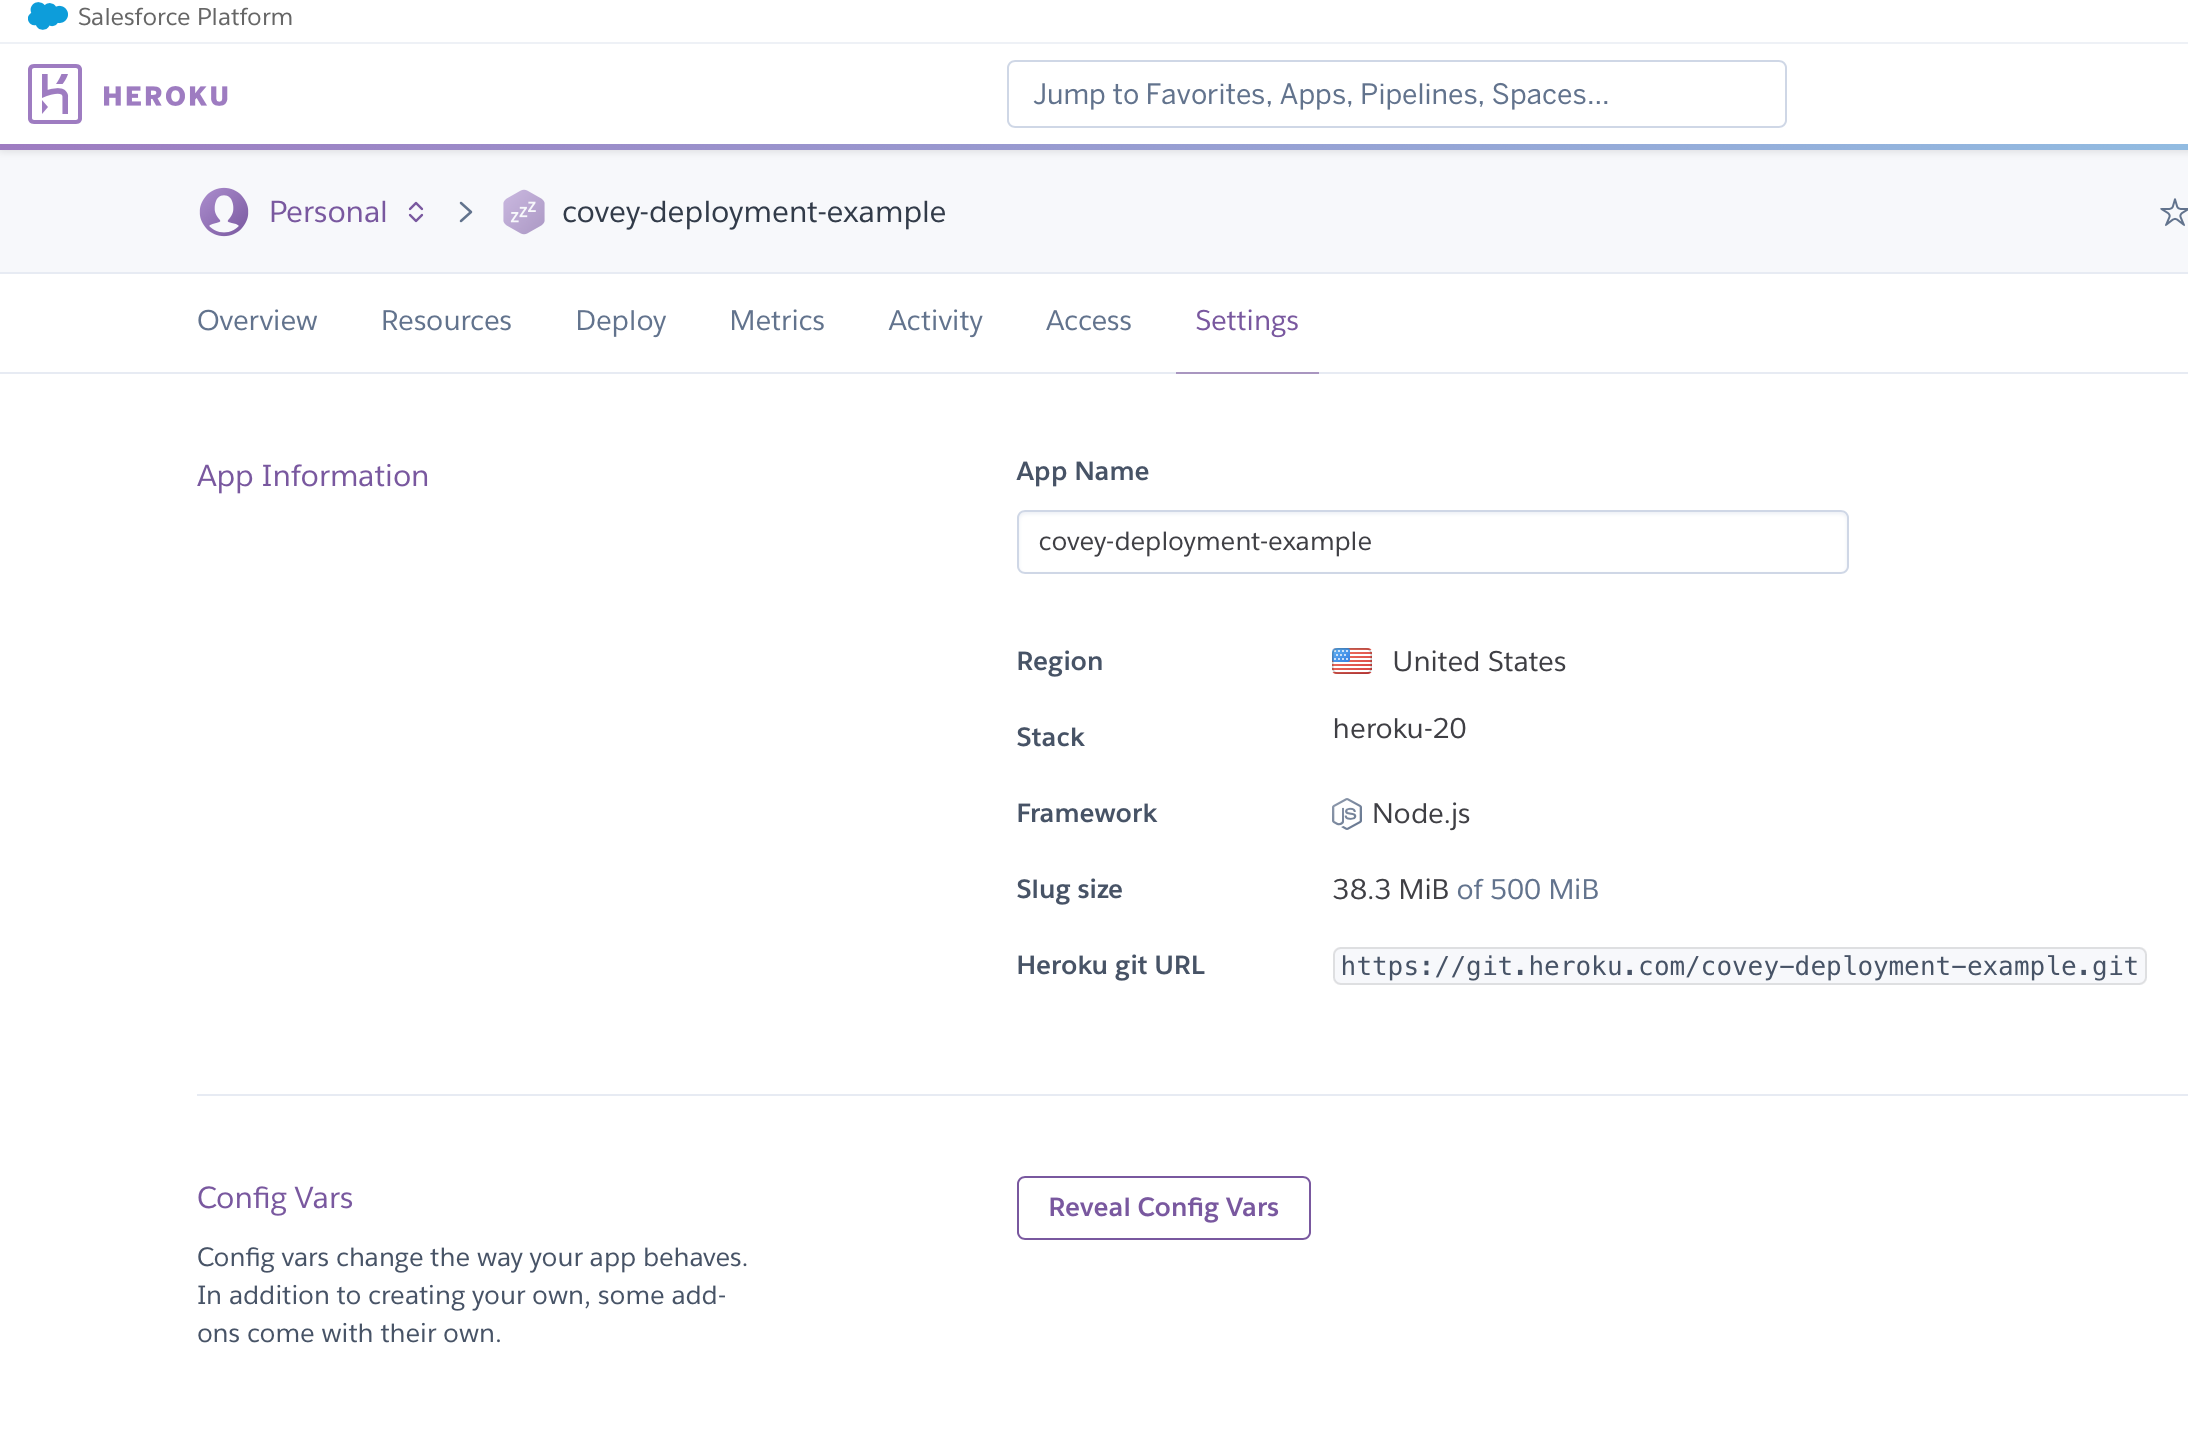
- Click “Reveal Config Vars”, and enter the 4 twilio configuration variables from your
.envfile (the same 4 that you set up on GitHub Actions). Heroku’s “Config Vars” are the way that we tell Heroku what variables to use for.envwithout having to commit that file into the (publicly viewable) repository. Your configuration settings on Heroku should look like this now: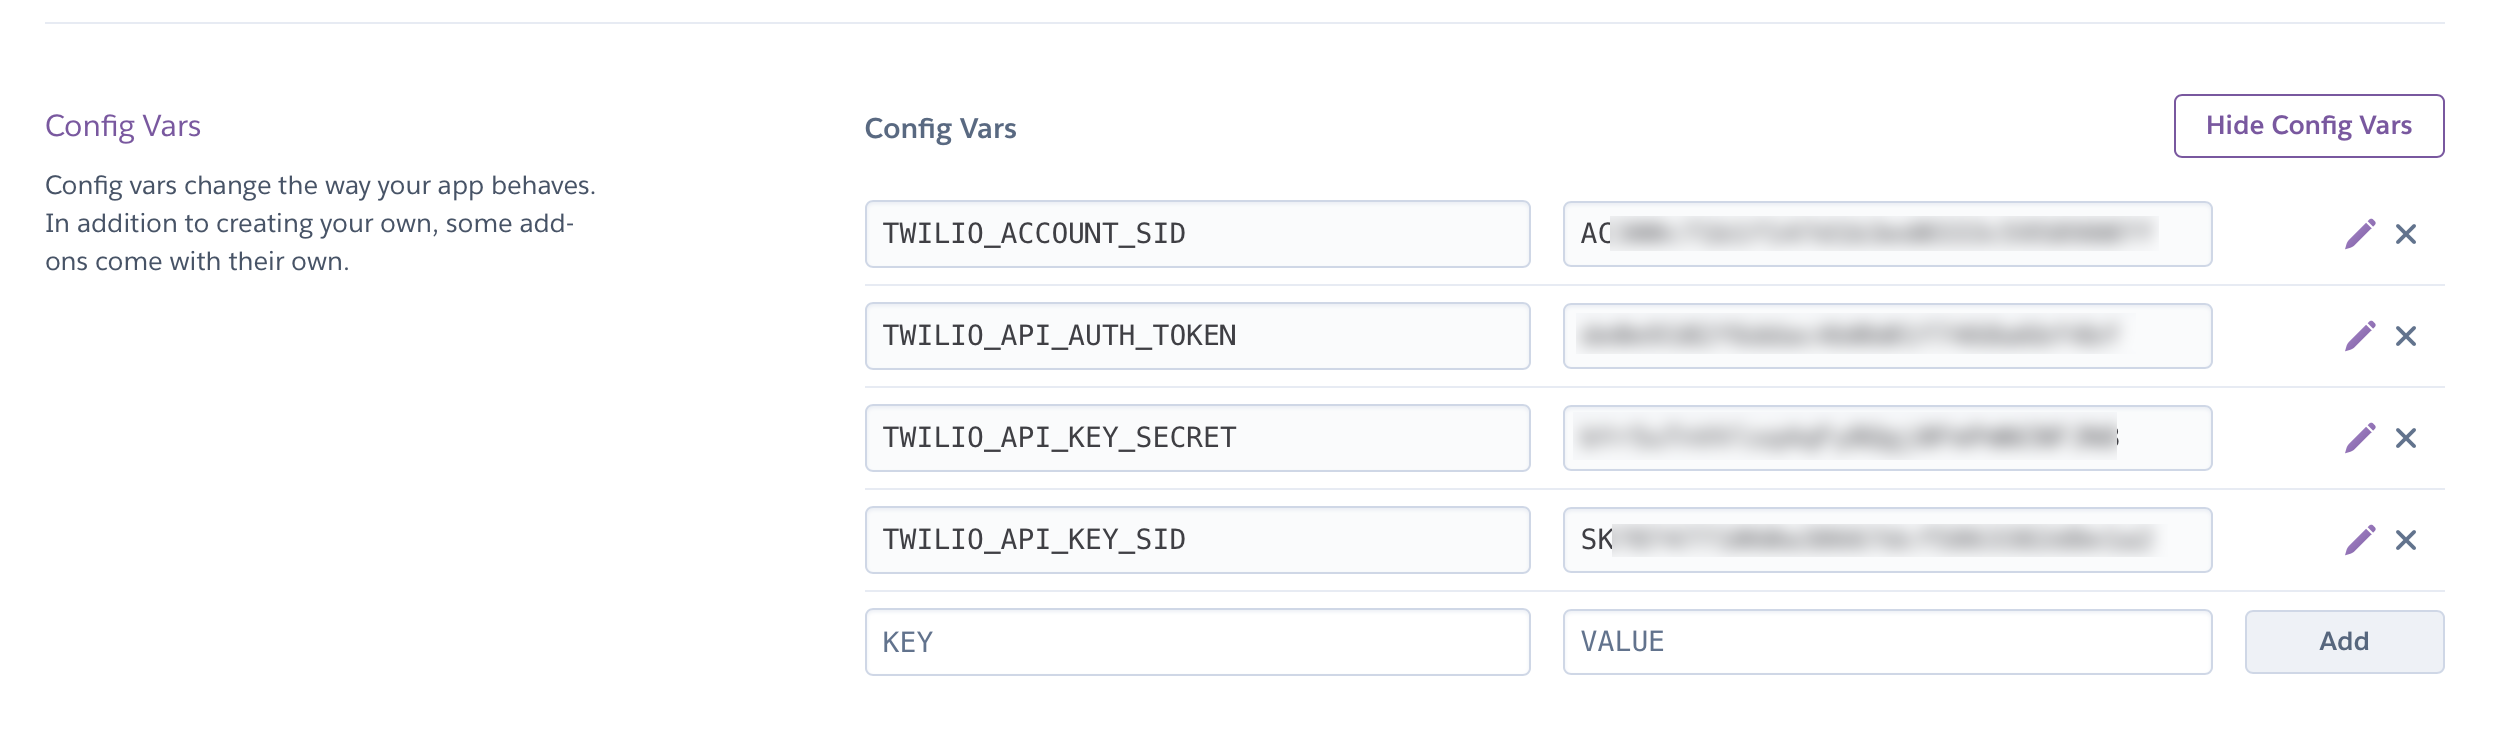
- Before navigating away from this settings page, scroll down to “Domains”, and take note of the address that Heroku has provided for your app. This should say something like “Your app can be found at https://covey-deployment-example.herokuapp.com/”.
- Retrieve your personal Heroku API key. From Heroku go to “Manage Account” (click on the profile menu on the top right of the page and then click “Account Settings”.
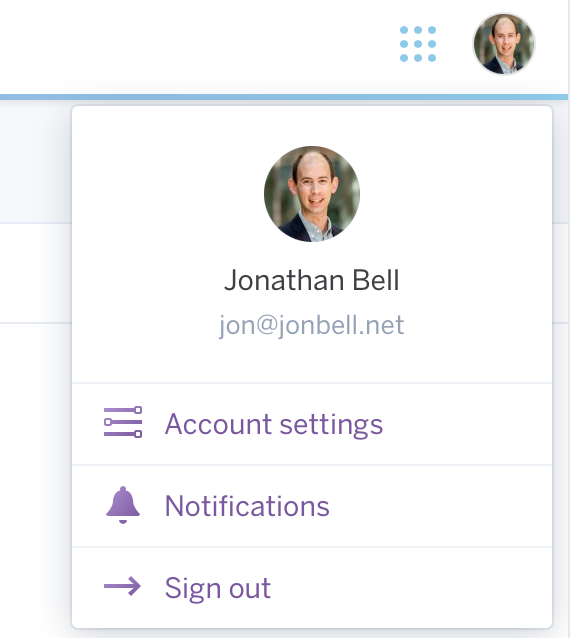 Scroll down to “API Key” and click “Reveal”. Copy this key, you’ll use it in the next step.
 - Return to the GitHub Settings -> Secrets pane, and add a new secret:
HEROKU_API_KEY, setting the value to the exact string that you copied from “API Key” in the last step. Add the secretHEROKU_APP_NAME, set to the name that you choose for your Heroku app in step 2. Add the secretHEROKU_EMAIL, set to the email address that you used when you created your Heroku account. Even though these last two values aren’t secret per-say, configuring them in this way keeps them out of the config files, so you won’t run into merge conflicts with our upstream branch (which would have amain.ymlfile with our own settings in it). Return to your GitHub Actions page, and the detail view for the most recent build - retrigger it, so that it runs again. Now that we have the Heroku secrets installed, we expect the “Deploy to Heroku” aspect of the deployment job to pass, although the “deploy to netlify” task will still fail. Here is the segment of the GitHub Actions configuration file that deploys our app to Heroku:
deploy: if: github.ref == 'refs/heads/master' needs: build-and-test runs-on: ubuntu-latest steps: - uses: actions/checkout@v2 - uses: akhileshns/heroku-deploy@v3.12.12 # Deploy to Heroku action with: heroku_api_key: ${{secrets.HEROKU_API_KEY}} heroku_app_name: ${{secrets.HEROKU_APP_NAME}} heroku_email: ${{secrets.HEROKU_EMAIL}}- To confirm that your service is successfully deployed, try to visit it in your browser. Use the URL that you noted in step 5 (“Your app can be found at https://covey-deployment-example.herokuapp.com/”). Append
townsto the URl, and visit it in your browser (e.g.https://covey-deployment-example.herokuapp.com/towns). After a short delay, you should see the response{"isOK":true,"response":{"towns":[]}}.
Set up Netlify
The last step to our continuous development pipeline will be to automatically deploy our frontend to Netlify. Netlify will create an optimized production build of your frontend (by running npm run build) and host it in their globally-distributed content delivery network.
- Create a free account on Netlify. We suggest signing up with GitHub.
- After logging in, select “Create a new site from git”, and then select “GitHub” as your git provider. Follow the prompts to connect Netlify with GitHub, and then choose the account/organization that has your Covey.Town fork and select the repository. Leave “branch to deploy” as “master”. Set the build command to:
CI= npm run-script buildand publish directory tobuild. Click deploy site. - Click on “Site Settings” and then select “Build & deploy” from the left-hand sidebar. Click on “Edit settings” in the first section (“Build settings”). Change base directory to
frontend. Your settings shoudl now look like this: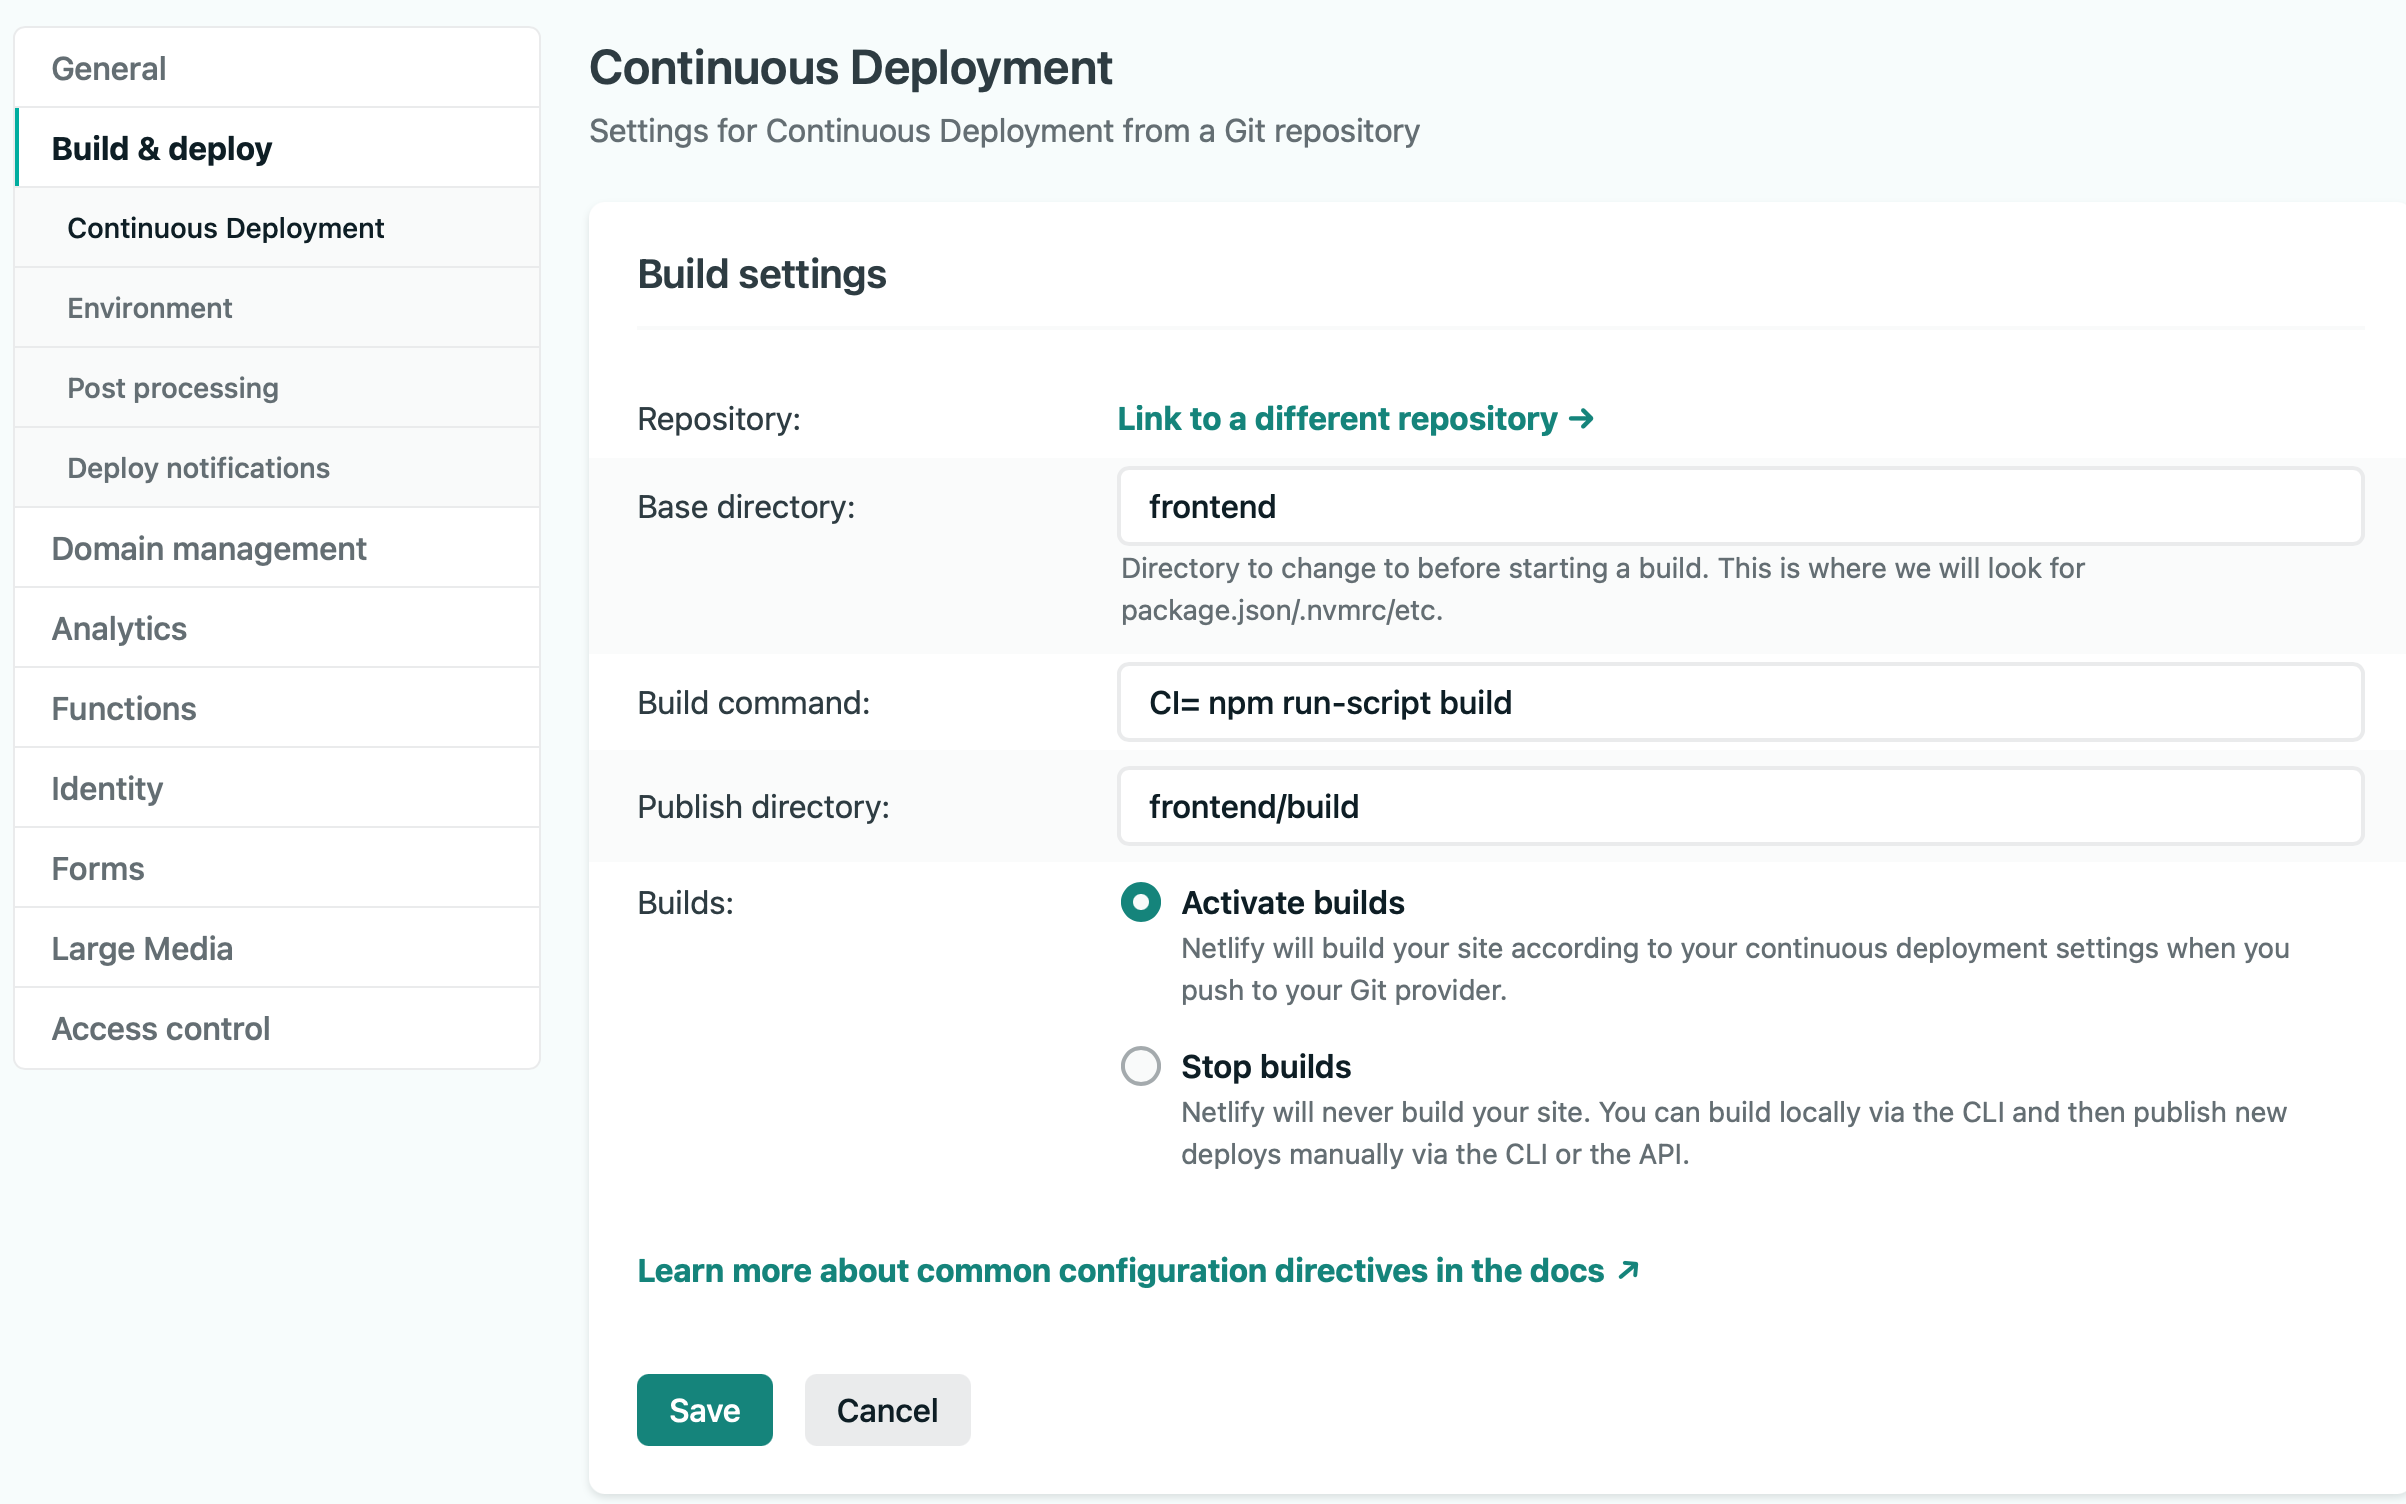
- Scroll down on this same settings page to “Environment”. This is where we define the
.envvariables that Netlify should use (without needing to put.envin a publicly viewable place). Click “Edit variables” and add a single variable:REACT_APP_TOWNS_SERVICE_URLshould be set to your heroku server name (https://yourapp-name.herokuapp.com, find in heroku “settings” page for your app). - Netlify will take several minutes to build your site. From the “Deploys” view of Netlify’s control panel, you can see the status of each build. Once you have a successful build, it will show a URL where your site is published (something like https://mystifying-beaver-b51dd2.netlify.app).
Note: the original version of this tutorial configured disabled the “Auto publish” feature of Netlify, in favor of triggering that publication from GitHub Actions only after a successful test suite execution. Unfortunately, that approach did not actually publish the build. If your site is not automatically deploying, login to the Netlify “Deploys” administrator panel, and click ‘Start auto publishing.’